Invoking Workflows
There are multiple ways to start a workflow:
Dispatch Workflow Activity Using activities such as Dispatch WorkflowInvoking Workflows.
Using the Elsa library.
In this guide, we will see an example of each of these methods.
Before you start
For this guide, we will need the following:
An Elsa Server project
An Elsa Studio instance
docker pull elsaworkflows/elsa-studio-v3:latest docker run -t -i -e ASPNETCORE_ENVIRONMENT='Development' -e HTTP_PORTS=8080 -e ELSASERVER__URL=https://localhost:5001/elsa/api -p 14000:8080 elsaworkflows/elsa-studio-v3:latest
Please return here when you are ready.
Tutorials
Elsa Studio
The easiest way to start a workflow is directly from Elsa Studio.
Start Elsa Server
Run Elsa Server:
dotnet run --urls=https://localhost:5001Start Elsa Studio
Run Elsa Studio:
docker pull elsaworkflows/elsa-studio-v3:latest docker run -t -i -e ASPNETCORE_ENVIRONMENT='Development' -e HTTP_PORTS=8080 -e ELSASERVER__URL=https://localhost:5001/elsa/api -p 5002:8080 elsaworkflows/elsa-studio-v3:latestCreate a Workflow
Create a new workflow called Using Elsa Studio
Add WriteLine Activity
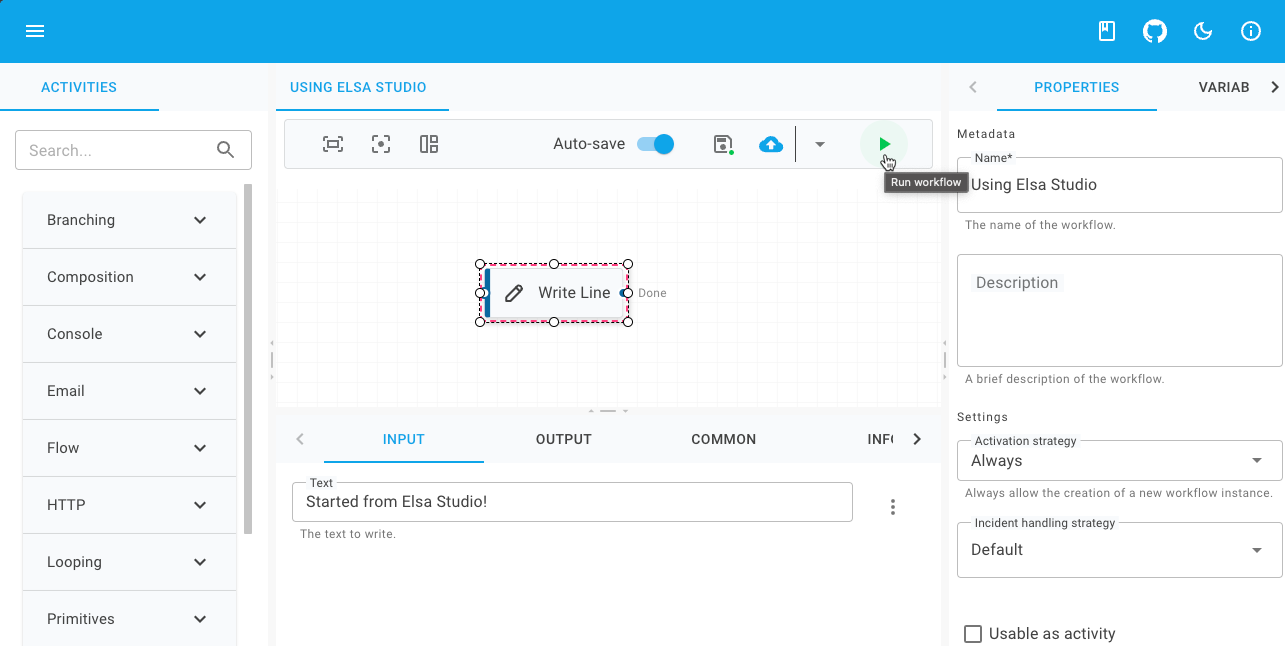
Add a WriteLine activity and configure it to print the text Started from Elsa Studio!
Start the Workflow
On the far end of the toolbar above the design surface, press the play icon. This will create and start a new instance of your workflow.
Create a Workflow
Create a new workflow class called
UsingElsaStudiowith the following implementation:Workflows/UsingElsaStudio.cs
using Elsa.Workflows; using Elsa.Workflows.Activities; using Elsa.Workflows.Contracts; using JetBrains.Annotations; namespace ElsaServer.Workflows; [UsedImplicitly] public class UsingElsaStudio : WorkflowBase { protected override void Build(IWorkflowBuilder builder) { builder.Root = new WriteLine("Hello from Elsa Studio!"); } }Start Elsa Server
Run Elsa Server:
dotnet run --urls=https://localhost:5001Start Elsa Studio
Run Elsa Studio:
docker pull elsaworkflows/elsa-studio-v3:latest docker run -t -i -e ASPNETCORE_ENVIRONMENT='Development' -e HTTP_PORTS=8080 -e ELSASERVER__URL=https://localhost:5001/elsa/api -p 5002:8080 elsaworkflows/elsa-studio-v3:latestOpen the Workflow
From the left menu, go to and select the programmatic workflow.
Start the Workflow
On the far end of the toolbar above the design surface, press the play icon. This will create and start a new instance of your workflow.
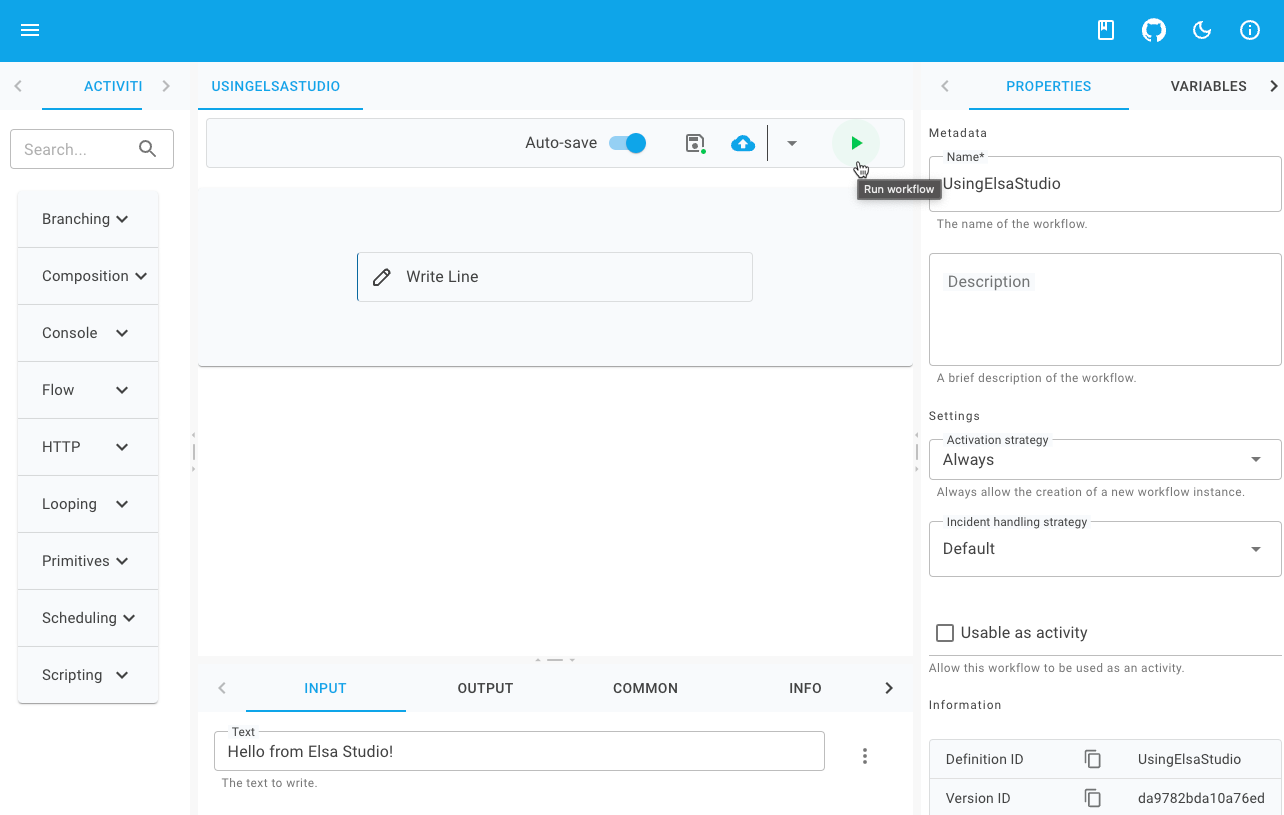
Upon clicking the start button, the workflow will execute.
Triggers
Another way to kick off a new workflow execution is by having the workflow be invoked through a trigger.
A trigger is represented by an activity, which provides trigger details to services external to the workflow that are ultimately responsible for triggering the workflow.
Elsa ships with various triggers out of the box, such as:
HTTP Endpoint: triggers the workflow when a given HTTP request is sent to the workflow server.
Timer: triggers the workflow each given interval based on a TimeSpan expression.
Cron: triggers the workflow each given interval based on a CRON expression.
Event: triggers when a given event is received by the workflow server.
We will use the HTTP Endpoint trigger as an example to invoke the workflow whenever a certain HTTP request is sent to the server.
Start Elsa Server
Run Elsa Server:
dotnet run --urls=https://localhost:5001Start Elsa Studio
Run Elsa Studio:
docker pull elsaworkflows/elsa-studio-v3:latest docker run -t -i -e ASPNETCORE_ENVIRONMENT='Development' -e HTTP_PORTS=8080 -e ELSASERVER__URL=https://localhost:5001/elsa/api -p 5002:8080 elsaworkflows/elsa-studio-v3:latestCreate a Workflow
Create a new workflow called Using HTTP Trigger
Add HTTP Endpoint Activity
Add an HTTP Endpoint activity and configure it as follows:
Property
Value
Tab
Path
hello-world
Input
Supported Methods
[GET]
Input
Trigger workflow
Checked
Common
Add HTTP Response Activity
Add an HTTP Response activity and configure it as follows:
Property
Value
Tab
Status Code
OK
Input
Content
Hello world!
Input
Connect Activities
Connect the HTTP Endpoint activity to the HTTP Response activity

Publish
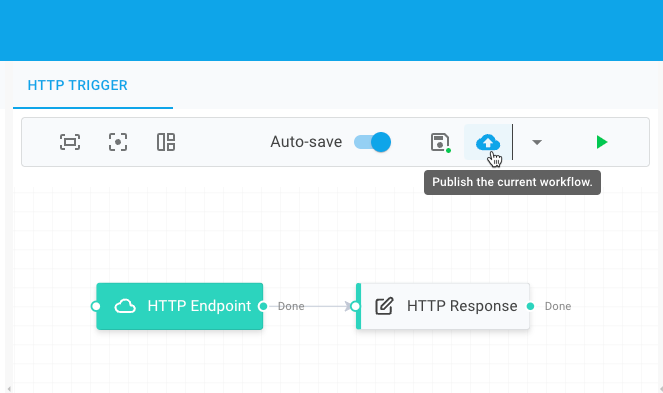
In order to activate the trigger, the workflow must be published.
To publish the workflow, click the button:
Trigger the Workflow
Although we technically could start this workflow using the button, this would immediately suspend the workflow's execution, due to the way that the trigger activities are designed.
The correct way to trigger a workflow starting with an HTTP Endpoint activity as its trigger is to send an HTTP request to the workflow server.
In order to send an HTTP request that triggers the workflow, we need the following information:
The complete URL pointing to the workflow.
The expected HTTP methods
Both these details can be easily found on the HTTP Endpoint activity:
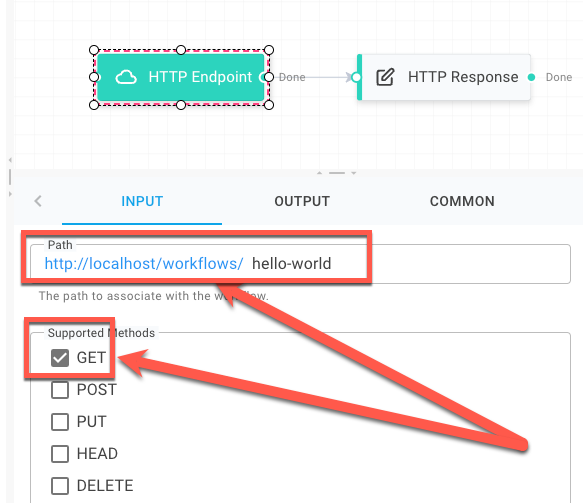
This translates to the following curl:
curl --location 'https://localhost:5001/workflows/hello-world'And since this is a simple GET request, we can paste the URL straight into the browser:

The HTTP Endpoint activity offers a simple yet effective way to trigger workflows via HTTP requests.
To learn more about implementing HTTP workflows, be sure to follow the HTTP Workflows guide
Dispatch Workflow Activity
The Dispatch Workflow activity can start a new workflow from the current workflow.
It allows you to specify what workflow to run and provide any input required by the workflow.
Let's try it out.
Start Elsa Server
Run Elsa Server:
dotnet run --urls=https://localhost:5001Start Elsa Studio
Run Elsa Studio:
docker pull elsaworkflows/elsa-studio-v3:latest docker run -t -i -e ASPNETCORE_ENVIRONMENT='Development' -e HTTP_PORTS=8080 -e ELSASERVER__URL=https://localhost:5001/elsa/api -p 5002:8080 elsaworkflows/elsa-studio-v3:latestCreate a Workflow
Create a new workflow called Dispatch Workflow
Add Dispatch Workflow Activity
Add a Dispatch Workflow activity and configure it as follows:
Property
Value
Tab
Workflow Definition
Using Elsa Studio
Input
Start the Workflow
On the far end of the toolbar above the design surface, press the play icon. This will create and start a new instance of your workflow.
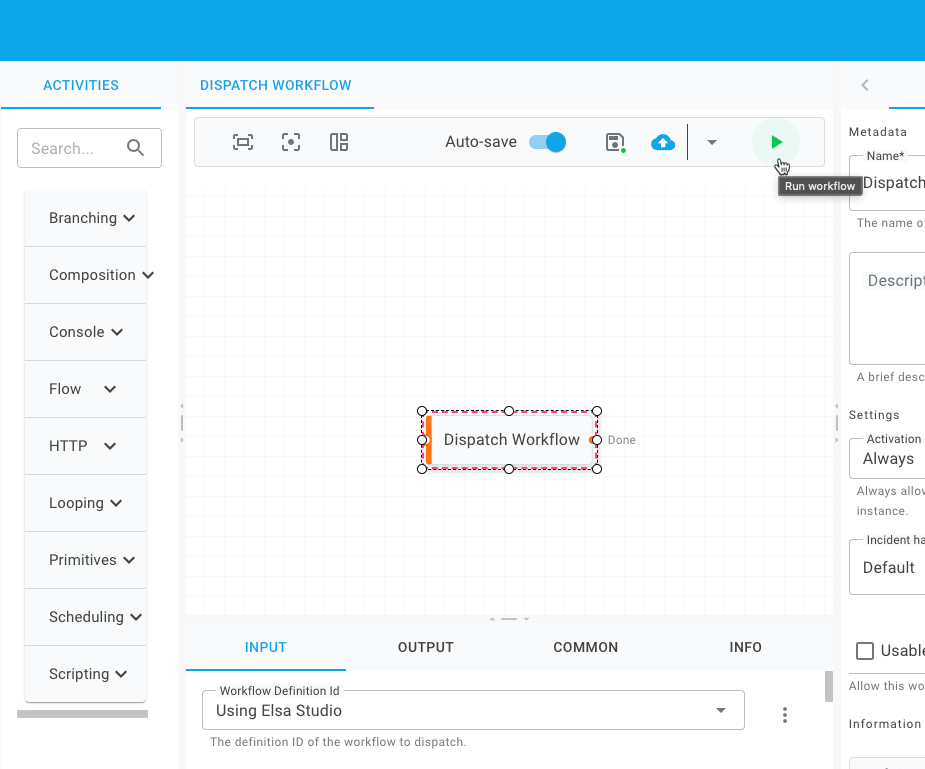
Navigate to to see that the workflow did indeed invoke the Using Elsa Studio workflow:
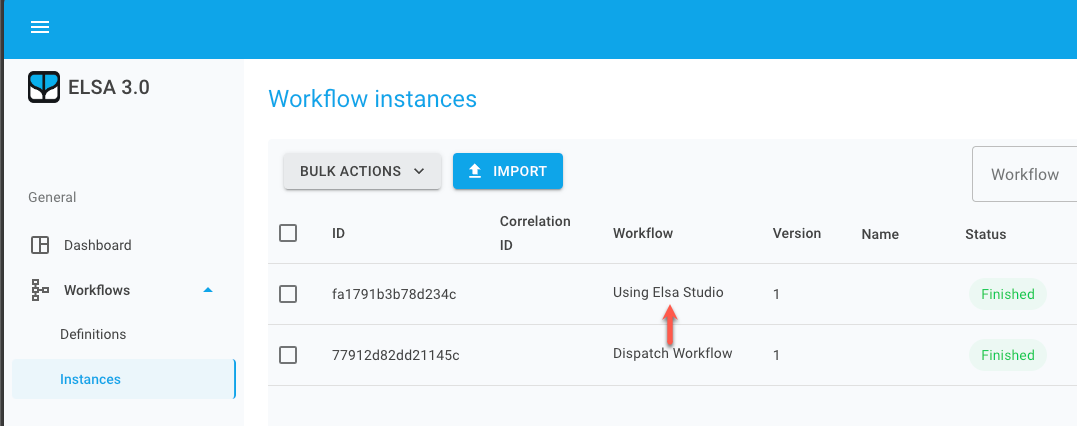
The Dispatch Workflow activity offers a simple way to invoke a workflow from another workflow.
Elsa REST API
When setting up Elsa Server from the installation guide, it will include the Elsa API module which exposes API endpoints.
These endpoints are consumed by Elsa Studio, but can also be used by your own application and from other HTTP clients such as Postman.
One of these endpoints provides the ability to start a workflow.
The following curl shows an example that starts a workflow:
Elsa Library
It is also possible to programmatically execute workflows from within the Elsa Server itself. For example, you could have a custom API controller from which you want to invoke a specific workflow
Elsa offers various services, ranging from general-purpose low-level services such as IWorkflowRunner to opinionated high-level services such as IWorkflowRuntime
.
The right service to use depends on your use case. When you have a workflow definition ID that you want to execute immediately, use the IWorkflowRuntime service:
If you want to execute a workflow asynchronously and not wait for it to start or complete, you can use IWorkflowDispatcher: